
Introduction to Kool Aid Pickles
When I first heard about Kool Aid Pickles, I was both intrigued and skeptical. How could the tanginess of dill pickles blend with the sweetness of Kool-Aid? But curiosity got the best of me, and I decided to experiment in my kitchen. Honestly, they turned out to be a delightful surprise! This fun twist on a classic snack is perfect for busy moms like us. With minimal effort and just a little patience, you’ll impress your loved ones with a unique flavor explosion. Let’s dive into this colorful adventure!
Why You’ll Love This Kool Aid Pickles
Kool Aid Pickles are not just a snack; they’re a taste sensation! Easily prepared, they require minimal kitchen time—perfect for busy days. The combination of tangy and sweet is downright addictive. Plus, these pickles are a fun conversation starter! You get to enjoy the incredible flavors without hours spent in the kitchen. It’s a delightful treat that can make any gathering feel special.
Ingredients for Kool Aid Pickles

Gathering the right ingredients for these Kool Aid Pickles is a breeze! Here’s what you’ll need:
- Dill pickle spears or whole pickles: The foundation of this recipe. Opt for your favorite brand or homemade pickles for a personal touch.
- Kool-Aid: Choose a flavor that tickles your taste buds! Cherry and tropical punch are classics, but feel free to get creative with grape, watermelon, or blue raspberry.
- Granulated sugar: This adds sweetness to balance the tanginess. Adjust according to your preference; you might like it extra sweet!
- Water: Just regular tap water to mix with the Kool-Aid and sugar, transforming it into a flavorful brine.
For those of you looking for alternatives, consider using low-sugar or sugar-free Kool-Aid. It’s a tasty option if you’re watching your sugar intake! And if whole pickles aren’t your thing, spears work just as well for easy snacking.
You can find the exact measurements for each ingredient at the bottom of the article, making it easy for you to print and take to the grocery store.
How to Make Kool Aid Pickles
Making Kool Aid Pickles is a fun and straightforward process! Each step brings you closer to a unique treat that will surprise and delight everyone. Here’s how you can whip up these sweet and tangy wonders in no time.
Step 1: Drain the Pickles
First things first, it’s time to get the pickles ready. Pour the pickle juice from the jar into a large mixing bowl. Don’t worry about wasting it; we’ll use that juice soon! Carefully remove the pickles and set them aside. This step is vital because you want to infuse the pickles with the Kool-Aid goodness.
Step 2: Mix the Kool-Aid Brine
Now comes the exciting part! Add the Kool-Aid powder and your chosen amount of sugar into the pickle juice. Stir this magical mixture thoroughly until the sugar completely dissolves. The vibrant color will start to shine through, hinting at the fun flavors ahead! It’s like creating a potion for a culinary adventure.
Step 3: Combine & Refrigerate
Once your brine is ready, it’s time to bring the pickles back into the game. Place them back into the jar, or use an airtight container if you prefer. Pour that colorful Kool-Aid mixture over the pickles, ensuring they’re fully submerged. Cover tightly and pop them into the refrigerator. This step makes the magic happen!
Step 4: Chill & Marinate
Patience is the name of the game here. Seal your jar tightly and let it chill in the refrigerator for at least 5-7 days. During this time, shake the jar once a day to help distribute the flavors. Imagine the pickles soaking up that sweet, tangy essence! It’s like a flavor transformation waiting to happen.
Step 5: Serve & Enjoy
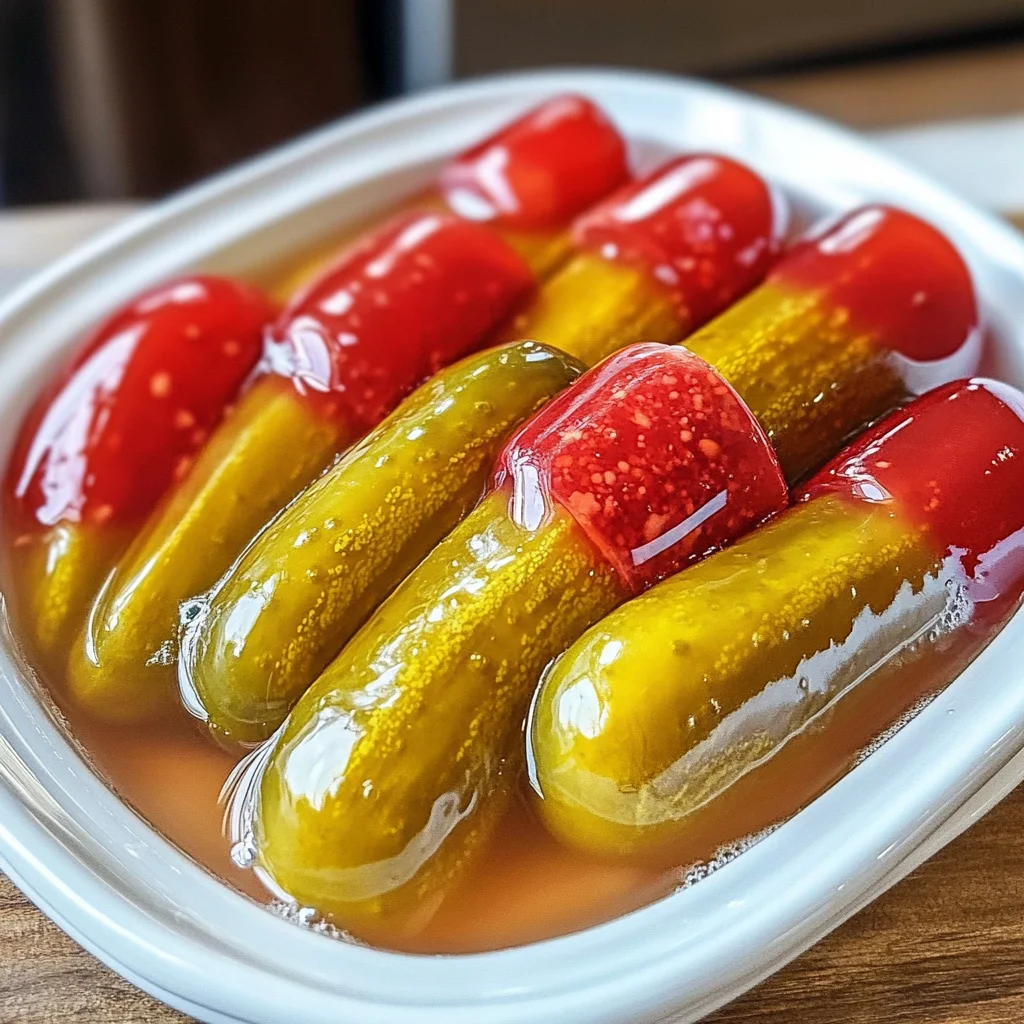
After waiting oh-so-patiently, your Kool Aid Pickles are finally ready to be enjoyed! Serve them chilled for a delightful snack that’s sure to be a hit. They make great party treats or unique finger foods. Just watch out for people asking for seconds—you might not have enough to share!
Tips for Success
- Ensure pickles are fully submerged in the Kool-Aid brine for even flavor.
- Label your container with the date so you know when they’re ready.
- Feel free to experiment with different Kool-Aid flavors for variety.
- If you prefer a sweeter taste, gradually increase the sugar until it’s just right.
- Use a glass jar to avoid color staining with vibrant Kool-Aid.
Equipment Needed
- Large mixing bowl: Any bowl will do, but a glass one lets you see the colorful brine!
- Airtight container or jar: Use a clean glass jar for storage, or a plastic container if that’s what you have handy.
- Spoon or whisk: For mixing the brine; grab any utensil from your spork collection!
Variations on Kool Aid Pickles
- Fruit Infusion: Add slices of fresh fruit, like strawberries or lemons, to elevate the flavor.
- Spicy Kick: Toss in a few slices of jalapeño for a sweet-and-spicy combo that packs a punch!
- Herb Twist: Experiment by adding fresh dill or mint for an herbal note, giving your pickles a unique twist.
- Low-Sugar Option: Use sugar substitutes or low-calorie sweeteners with your Kool-Aid for a guilt-free treat.
- Unconventional Flavors: Try out bold Kool-Aid flavors like blue raspberry or lemonade for a refreshing twist.
Serving Suggestions for Kool Aid Pickles
- Snack Time: Enjoy them straight from the jar alongside cheese and crackers for a colorful platter.
- Picnic Companion: Pair with sandwiches and fresh salads for a fun, vibrant lunch.
- Drink Pairing: Serve with lemonade or iced tea to complement the sweetness.
- Presentation: Arrange in a decorative bowl with fresh herbs for a stunning table display!
FAQs about Kool Aid Pickles
As with any adventurous recipe, questions are bound to arise! Here are some common queries about Kool Aid Pickles that might be on your mind.
Can I use different types of pickles for this recipe?
Absolutely! While dill pickles are traditional, feel free to experiment with bread-and-butter pickles or even sweet pickles. Each will give a unique twist to your sweet pickles.
How long do Kool Aid Pickles last in the fridge?
When properly stored in the refrigerator, Kool Aid Pickles can last up to two months. Just be sure to keep them submerged in the brine!
What if I want a less sweet version?
No worries! Start with a smaller amount of sugar and gradually add more, tasting as you go. You can always adjust the sweetness level to fit your family’s taste.
Can I add other flavors of Kool-Aid?
Of course! Be adventurous and try out different flavors. Grape, blue raspberry, or even tropical punch can add a delightful twist to your pickles!
Are Kool Aid Pickles vegan-friendly?
Yes! They’re not only vegetarian, but also vegan-friendly. There are no animal products involved in this fun, tangy snack.
Final Thoughts on Kool Aid Pickles
Making Kool Aid Pickles is not just about preparing a snack; it’s an adventure that can spark joy in your kitchen! The vibrant colors and unexpected flavors bring smiles not just to you, but to everyone who tries them. Every bite delivers a sweet and tangy surprise that dances on your palate, making it a fun treat for kids and adults alike. Plus, it fosters creativity and experimentation in your cooking. So, gather your loved ones, share these joyful pickles, and enjoy the delightful conversations that unfold. Trust me, your kitchen will be buzzing with excitement!
Print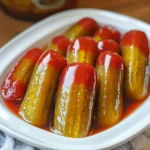
Kool Aid Pickles
- Total Time: 5-7 days (for marinating)
- Yield: Varies (depends on the number of pickles used)
- Diet: Vegetarian
Description
Kool Aid Pickles are a sweet and tangy treat that combines the classic flavor of dill pickles with the playful sweetness of Kool-Aid.
Ingredients
- 1 (32 oz) jar of dill pickle spears or whole pickles
- 1 packet (0.13 oz) of Kool-Aid (cherry, tropical punch, or your favorite flavor)
- 1/2 to 1 cup granulated sugar (adjust to taste)
- 2 cups water
Instructions
- Drain the Pickles: Pour the pickle juice from the jar into a large mixing bowl. Remove the pickles and set them aside.
- Mix the Kool-Aid Brine: Add the Kool-Aid powder and sugar to the pickle juice. Stir well until the sugar dissolves completely.
- Combine & Refrigerate: Place the pickles back into the jar (or a new airtight container). Pour the Kool-Aid mixture over the pickles, making sure they are fully submerged.
- Chill & Marinate: Seal the jar and refrigerate for at least 5-7 days, shaking the jar once a day to distribute flavors.
- Serve & Enjoy: Once the pickles have absorbed the flavor, they’re ready to eat! Serve chilled for the best taste.
Notes
- Flavor Options: Cherry and tropical punch are the most popular, but try grape, watermelon, or blue raspberry for fun variations!
- Sweetness Level: Start with ½ cup sugar and add more if you like a sweeter pickle.
- Storage: Keep refrigerated for up to 2 months.
- Prep Time: 15 minutes
- Cook Time: N/A
- Category: Snack
- Method: Refrigeration
- Cuisine: American
Nutrition
- Serving Size: 1 pickle spear
- Calories: 25
- Sugar: 6g
- Sodium: 300mg
- Fat: 0g
- Saturated Fat: 0g
- Unsaturated Fat: 0g
- Trans Fat: 0g
- Carbohydrates: 7g
- Fiber: 0g
- Protein: 0g
- Cholesterol: 0mg